
How to Level an RV: Practice makes Perfect!
An online search for “how to level an RV” may yield numerous results. Some good, and some bad. Hopefully you’ll feel confident in the information we provide. After all, we’ve been doing this full time for over three years now. So, we’ve certainly made our share of mistakes. That is not to say that RV leveling is difficult, it’s quite simple in fact. It’s just like a lot of things, practice makes perfect!
Please Note: This article is for travel trailers only. Motorhomes and some fifth wheels have other considerations. The concept is the same, however, some are equipped with automatic leveling systems and of course, with a motorhome, you are not required to unhitch.
Step 1. How to Level Your RV Left to Right
You arrive at your campsite and unhitch. You start the process of leveling front to rear, when it hits you… we didn’t check left to right! Why is this an issue? Well, to properly level your RV left to right, you need to drive up on leveling blocks on which ever side is sloping downward. Of course, at this point in time, it’ll require hitching the trailer up again to get it right. So, it’s important to remember that you must first level your RV left to right.
There are many of these RV leveling blocks on the market, but currently we use the Lynx brand. We’ve found these to be the best RV leveling blocks. These leveling blocks are quite nice as you can buy caps that go on them for a smoother surface, as desired. Also, they make RV wheel chocks that fit right into the pattern of the blocks for a secure fit. Once you have your RV leveled left to right, you can then work on leveling front to rear.
Step 2. How to Level Your RV Front to Rear
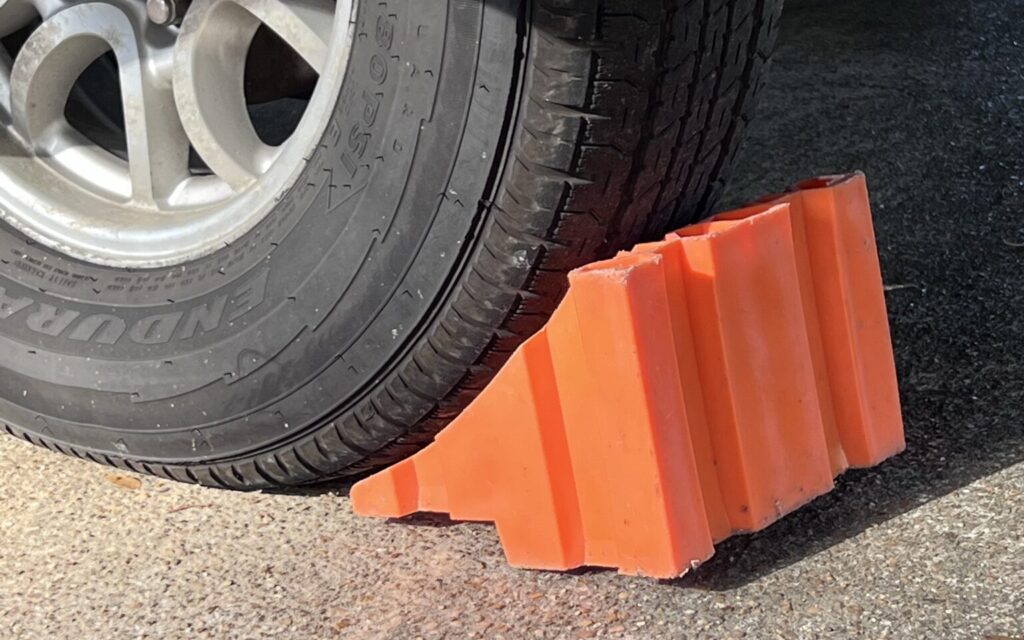
Leveling your RV front to rear will require you to unhitch from your tow vehicle. Before unhitching, ensure that you have inserted your RV wheel chocks first! This, of course, will prevent your rig from rolling either direction (assuming you place chocks in front an to the rear of your wheels).
What about X chocks? X chocks or “X-chocks” can be used, but as the manufacturer will recommend, standard RV wheel chocks should be used as well. X chocks are essentially considered additional stabilization versus standard chocks. Like chocks, they are best at reducing forward to rear movement. It’s important level your RV first, as X chocks should not be engaged while moving the tongue jack up or down.

Once chocks are inserted and you unhitch, you can begin leveling front to rear. This is done by raising or lowering the tongue jack. Some tongue jacks are manual, where you’ll need to crank a handle, while some are electric, which can be operated with the flip of a switch. Once you get your RV balanced front to rear, you can now move on to the final step, engaging your RV stabilizer jacks.
Step 3. Extend your RV Stabilizer Jacks
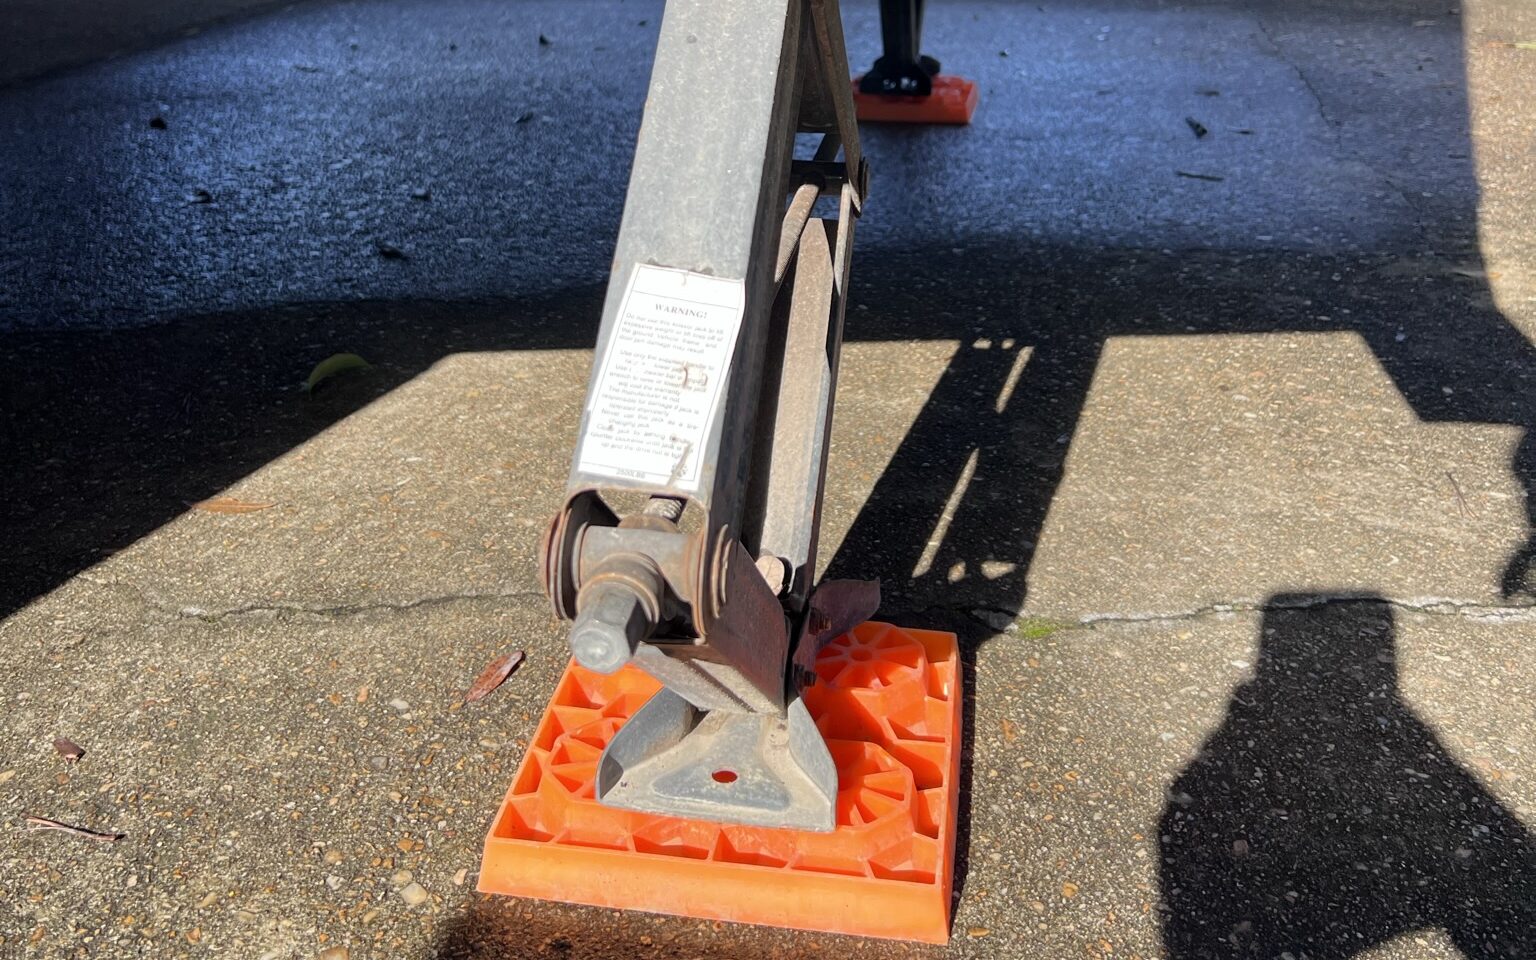
RV Stabilizer jacks, much like the name entails, are used for stabilizing your RV. They help with the extra bouncing that will occur if not used. Keep in mind, that they are only used for stabilizing your rig and not to jack it up. For this reason, I like to refer to them as “stabilizers.” As you might imagine, this is the last step, as engaging the stabilizers too early will put too much stress on them as you lower or raise your tongue jack. Ensure that stabilizers touch the ground, and then give your wrench a quarter to one full turn. The idea is that they reduce the bouncing from walking around in your RV, but not support the entire rig. Bonus tip: purchase a socket drill adapter, as this will lower and retract your stabilizer or scissor jacks much quicker than the manual method.
Now, hopefully you’ll know how to level an RV. It’s certainly not difficult, but it’s easy to get things out of order, especially when you’re new, or if you do not RV often. We’ve done it easily hundreds of times, yet every once in a while we may forget to check our rig left to right. So, just be patient and try not to rush your set up. Have any questions? Please let us know and thanks for reading!
Products featured in this post: